We all know that no blog can survive without SEO. Mostly bloggers use wordpress, as it is not setup to get you automatically better rank of your pages. You need to go for SEO of each page from title to meta key to keywords and each part of SEO takes lot of time to complete but you can do most of them by just few steps only. Yes!! it’s not magic but power of SEO most famous plugin Yoast SEO.
If you are not aware how to use this plugin then here I am writing steps of how to configure this plugin.
Following are the steps of configuration
1. Go to WordPress Dashboard, on left side you will find the button- plugins, hover over it and click Add new.
2. Put Yoast in search box and enter.
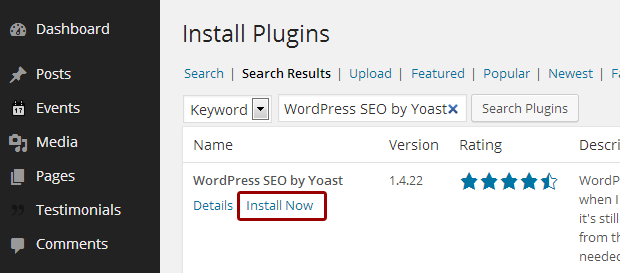
3. Click on install now, a pop up appears for confirmation, click ok on it.
4. Downloading and installing will take a little time, once it is done it is the time to activate it .click on activate plugin to do that.
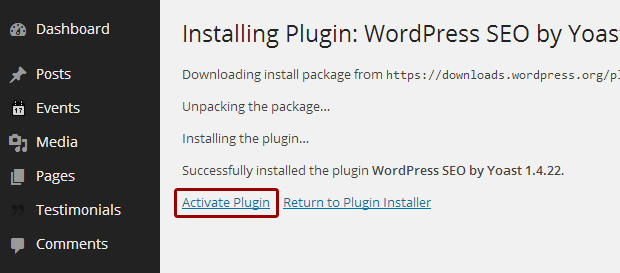
5. After activating the plugin, a new menu named as SEO will appear on the dashboard.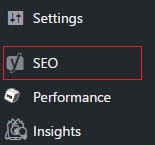
Click on Dashboard sub menu setting.
6. Dashboard > Dashboard & General : It is just for information so not need to go for that tab.
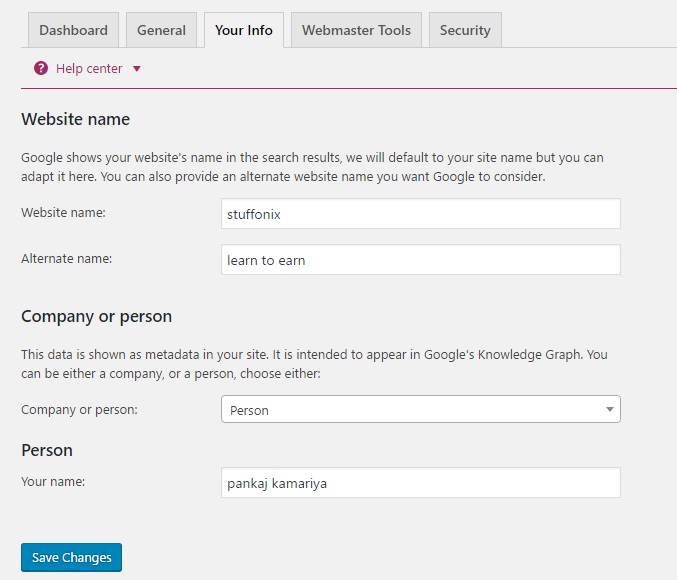
7. In Dashboard > Your info : Provide your website & company or person name (It is not compulsory & important)
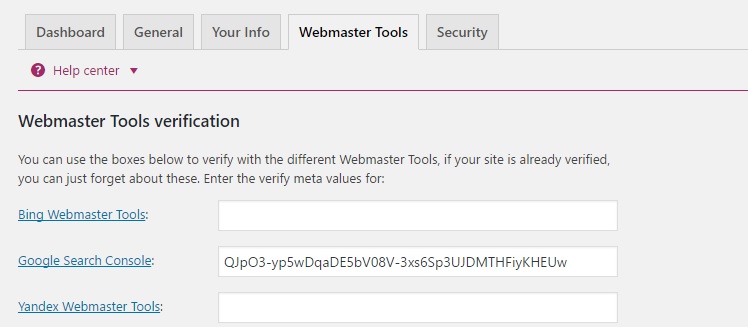
8. Dashboard > Webmaster Tools : Webmaster tools is one of the important part of this tool, here you need to verify your site for Bing, Google and yahoo webmaster tool means you are submitting your site to all these search engine. You need to click on each link to submit site.
Titles and Meta Settings:
This is one of the important tab for yoast setting so here I am providing you screen shot of most of setting just go one by one.
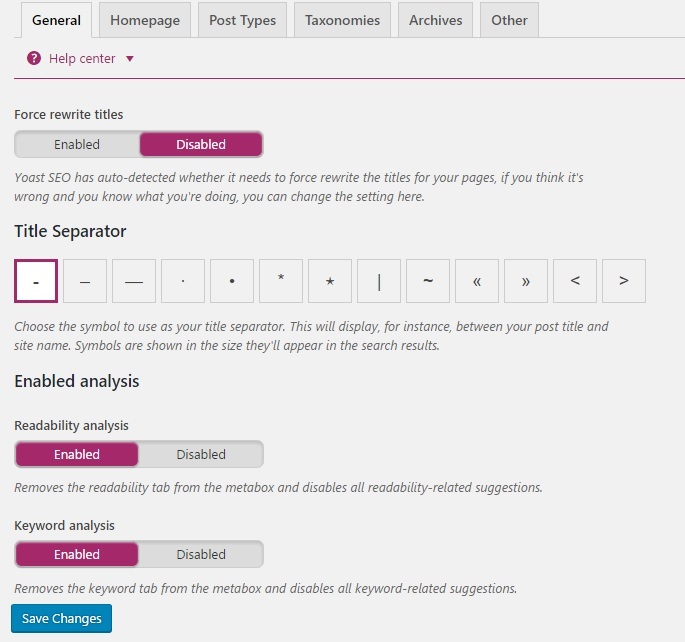
9. Titles and Meta > General:
There is no need to check in the’ force rewrite title’ it can be left blank and select proper title separator as below.
10. Go to dashboard>SEO> titles & Metas> home: Enter suitable title and meta description. It is the most important step as it tells google about the page. It is like a small introduction session between the website and the search engine. Now you need to click editing the front page itself » and make changes.
Title should be of 6-9 words and maximum 70 charcters. Meta descrioption has a limit of 156 charcters, one has to be crisp and informative to grab attention of the readers.
11. Dashboard>SEO> titles & Metas> Post types:
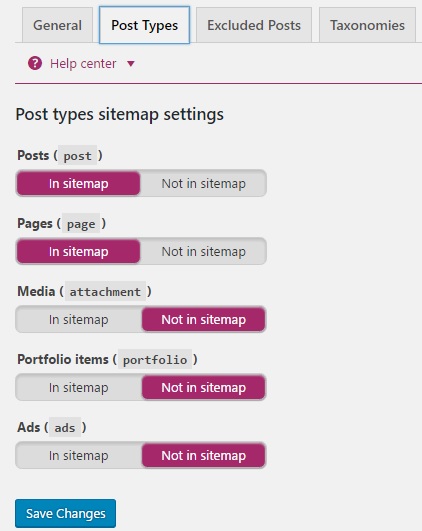
Here you configure SEO for all post type like page, post, media and ads . Please make sure you check help center link to learn about suitable template and understand more. More information please see image below.

Recommend to add meta description manually otherwise will automatically add description for your posts and pages.
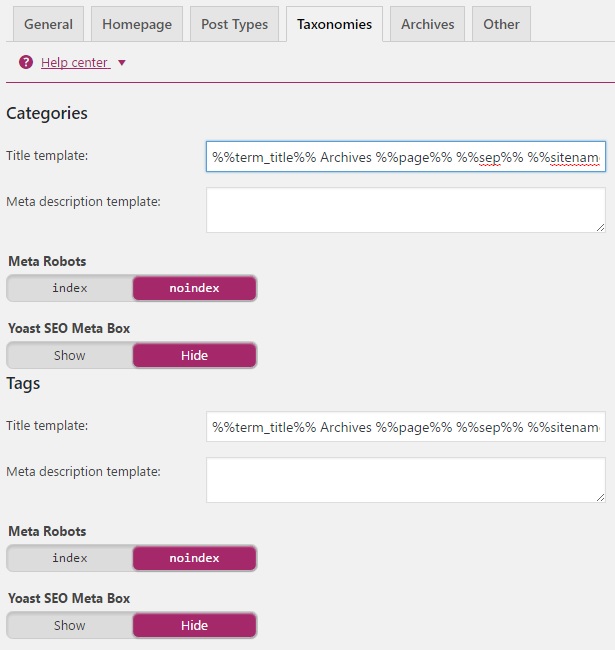
13. Dashboard>SEO> titles & Metas> Texonomy : In taxonomies check the box names as ‘no index, follow & hide’ As we don’t want to index categories , tags & formate . so we keep title template as it is.
14. Dashboard>SEO> titles & Metas> Archives: We recommend for single user disable author archives so it save from duplicate and if you have many author then you can check “Noindex” and “follow” boxes as below. Here you can do other settings like date archive and 404 error page.
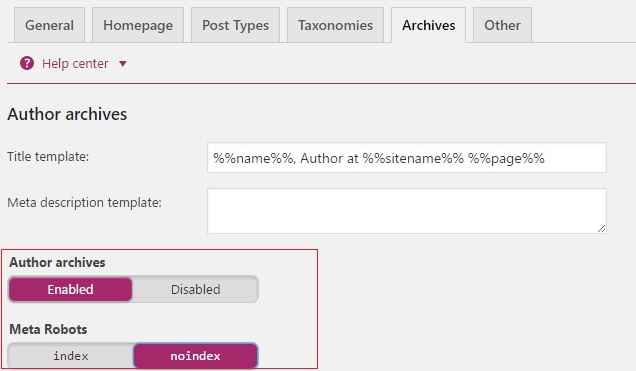
Recommend: It is a good idea to disable both of them as using author and data archive will lead to duplicate content.
15. Dashboard>SEO> Social : This setting help you to get your social media profile in the search engine whenever someone search for your brand name. here you just need to provide your social profile information.
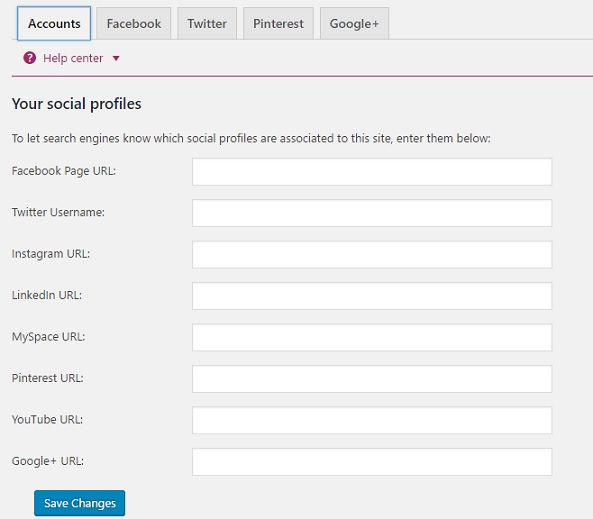
You can go Open Graph meta data for facebook and twitter .Moe information read here
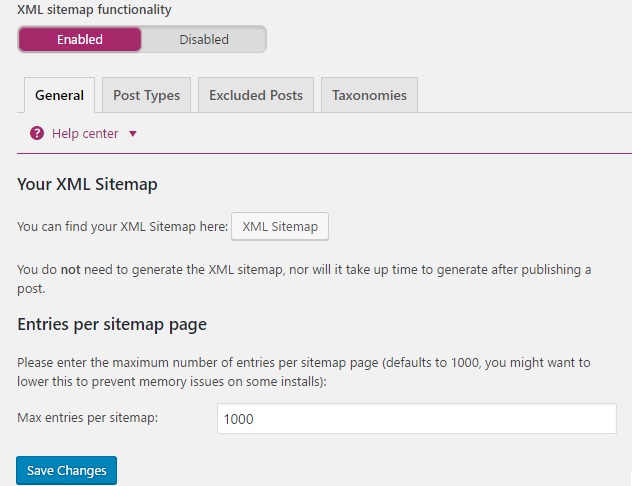
16. Dashboard>SEO>XML Sitemaps: it will enable the automatic XML sitemaps. This is also one of the important step to submit your website to google ,Bing and yahoo search engine so it help you to get indexing quickest.
By post type tab you can set what all thing you want to add in xml sitemap.
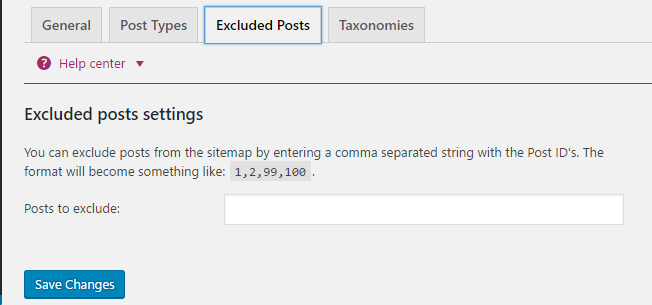
You can exclude post from sitemap by just mention here post ID.
17. Dashboard>SEO>Advanced: Breadcrumbs help your user & search engine to understand your site structure and navigate easily. so enable breadcrumbs like below.

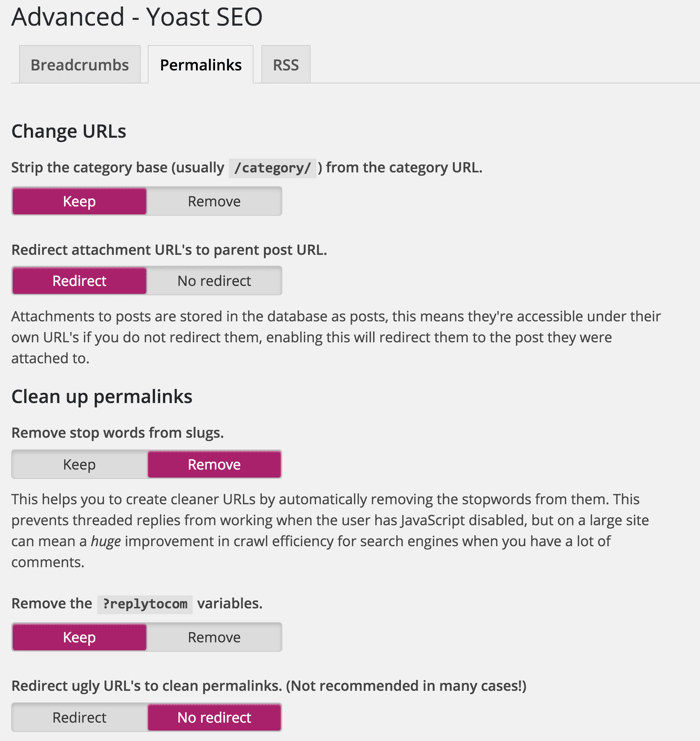
18. Finally Dashboard > SEO >Advance> Permalinks. Choose the following options.
19. Dashboard>SEO>Advanced>RSS: This will help you to get back linking when some one copy your content so it help you in ranking your article.
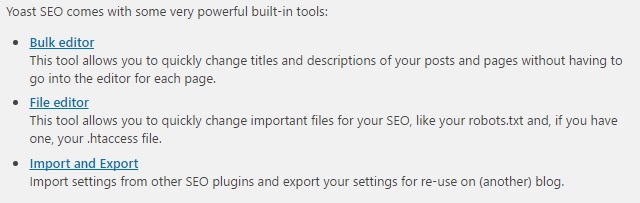
20. Dashboard>SEO>Tools: Here you find great tools like bulk edit by which you can edit titles and descriptions of your posts and pages without having to go into the editor for each page. file editor help you to edit the WordPress .htaccess and robots.txt file. Import and Export help you to save your settings which we have done yet. so it is very helpful for you to use this tool.
Finally
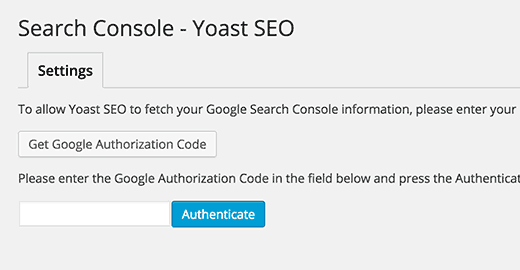
22. Dashboard>SEO>search console: Help you to connect your WordPress site to Google Search Console tools (webmaster tools). In order to do this click on get Google Authorization Code then it redirect you to other page where you will get code then put it in below text box and then authenticate.
More option you will get in advance yoast version…if you want to go for advance version then click here
Though the step seems longer and tedious to do, it is actually a very good place. Everything is self explanatory.
Hope you like this blog post…If yes then please subscribe this blog, follows us on twitter, like our Facebook page and if you have any doubt or want to add something then please write us in comment or contact us.
A big thanks for reading ![]()

