Table of Contents
There are several video editing software in the market. Some of these are free while some of them are paid. Unless you are a professional video editor you might want to stick to the free software as they get the job done quite well.
Professional video editors often use heavy video editing software like Adobe Premier and Final Cut Pro, while amateurs and people new to the field of video editing are advised to use Videopad Video editor and Windows Movie maker.

Not only are software like Windows movie maker available for free of cost on the internet, but they are also easy to use. Another benefit of Windows Movie maker is that they are very simple and can be used to edit long videos with cool animations with minimal efforts.
While there are several movie maker tutorials available on the internet, they explore different areas of expert video editing tips which can be used at an advanced level.
Here, we present to you 7 simple steps that will help any beginner teach how to make a video using the Windows Movie maker.
You can easily check if you have the Windows Movie maker pre-installed in your system by searching for it in the search bar. If it is not installed, you can download the latest version from the official Windows website.
Step 1: Importing video files
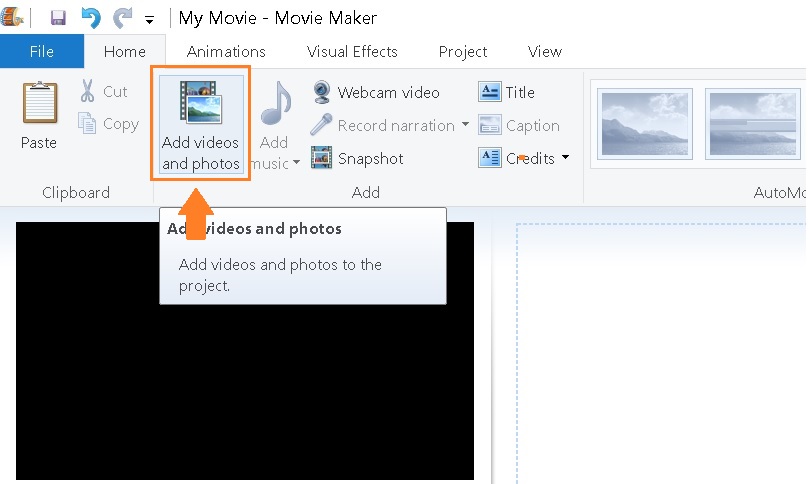
After you open your Windows Movie maker, you want to ensure that you have all your video files that you want to edit/join readily available in the software.
To do this, click on the left-hand side menu and import all the necessary files into the Windows Movie Maker. You can also drag and drop the required files directly onto the white empty space.
Step 2: Using the Trim tool
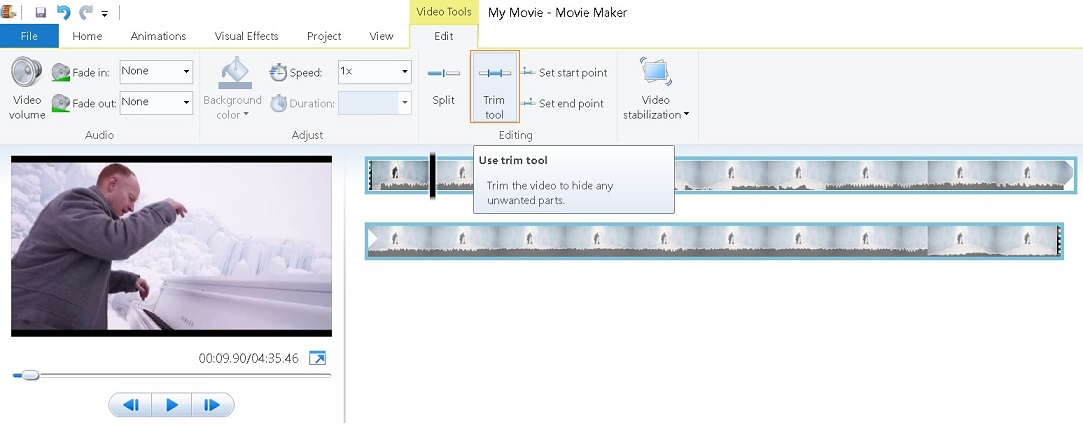
After you have finished importing the video, you can use the trim tool to cut out the portion of the video that you do not need.
This tool will help you select only the necessary parts of the video file that you want to edit or merge with some other video. Drag the video bar, below the video on the left-hand side, to the point where you want your video to be cut. After this, click save trim on the top menu.
Step 3: Add image Files
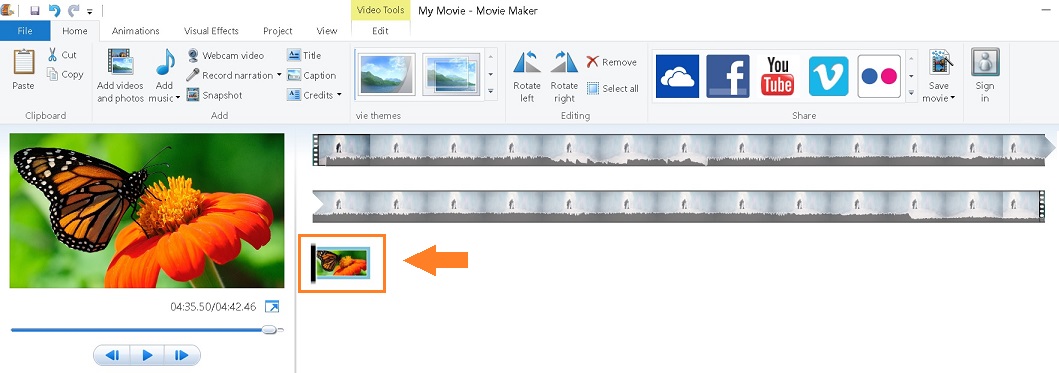
After the addition of the video files, you might want to add image files to depict end scene credits or first scene background image. To do this, again go to the same menu that you used to put in the video file.
After putting in the image, you can relocate the position of the image the part where you want it to be showed during the video. You can either set it to the beginning of the video or the end of the video as per your needs.
Step 4: Splitting the video to add relevant music files or delete a video part
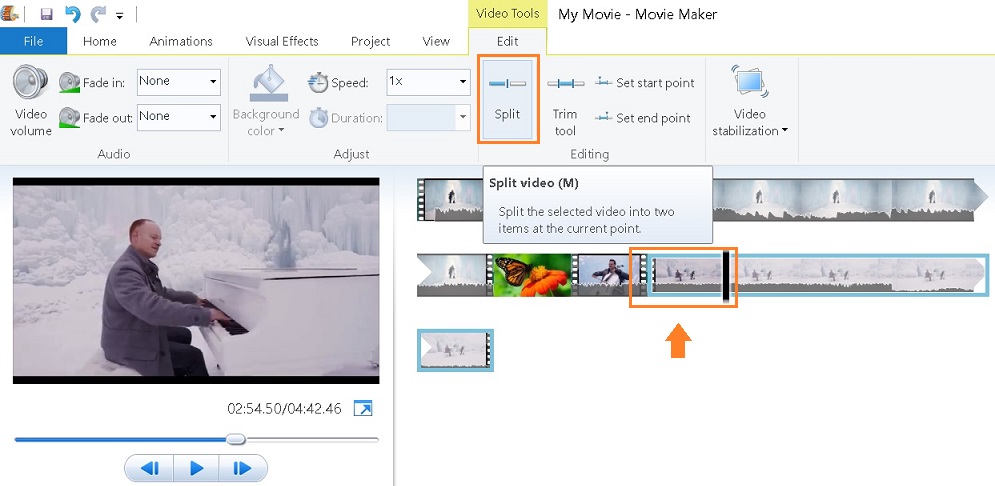
If you want the image to land somewhere in between, you can click the split button in the top menu at the video point, during video playback, where you want it to appear.
Also, you can split the video into three parts and delete the part that you want instead of replacing it with the image.
Step 5: Add audio files
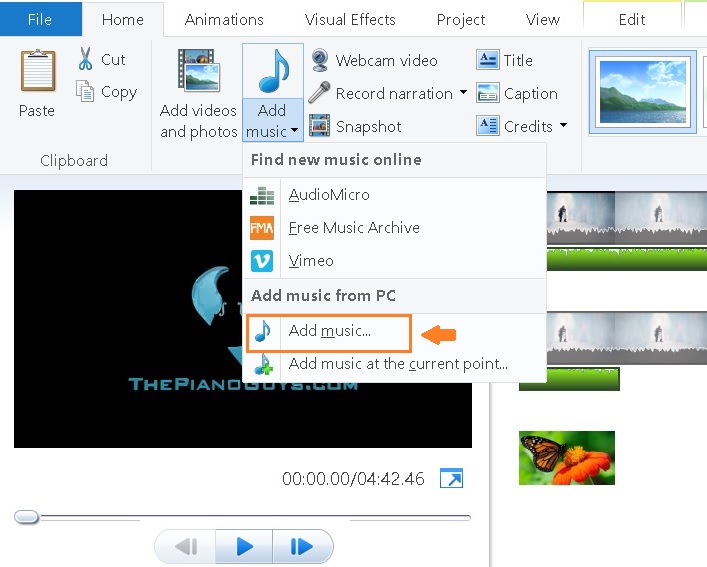
After adding the relevant audio and video files. it is time to add some music to the video. Choose the relevant piece of music from your PC and add it to your video.
You can import various kinds of audio files using the add music bar beside the add video and photos bar on the top menu. After addition of the music file, you can see a green bar running along the video length in the white space where your video was placed.
Here, you can check the audio file playback after hitting the video playback button on the left-hand side window.
Step 6: Changing duration of Image playback and add animations
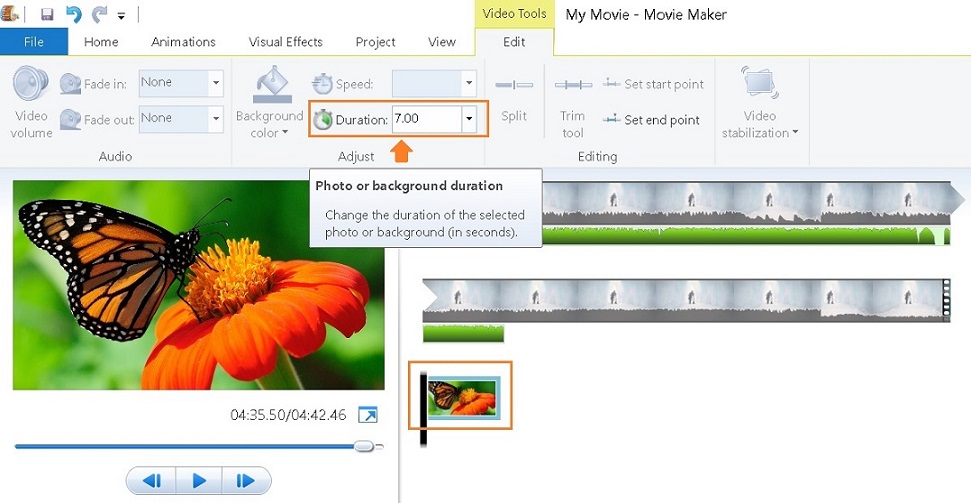
After you have imported all the necessary files you can change the duration of various files by double clicking on them and enter a new duration.
This will help you decide how long you want to play the image file. For example, you can choose the end credits image to play for 10 seconds instead of 7 seconds.
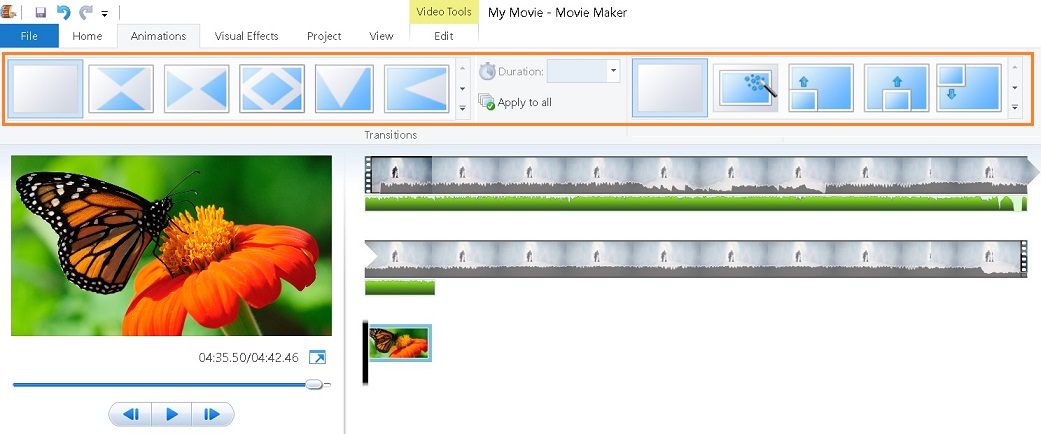
After this, you can experiment with various kinds of animations that will allow you to control how the picture or video plays and comes on the screen.
To see the different kinds of animations, you can check out the animation and visual effects bars on the top window and select the relevant transition that you want to a picture or a video.
Step 7: Saving your project file
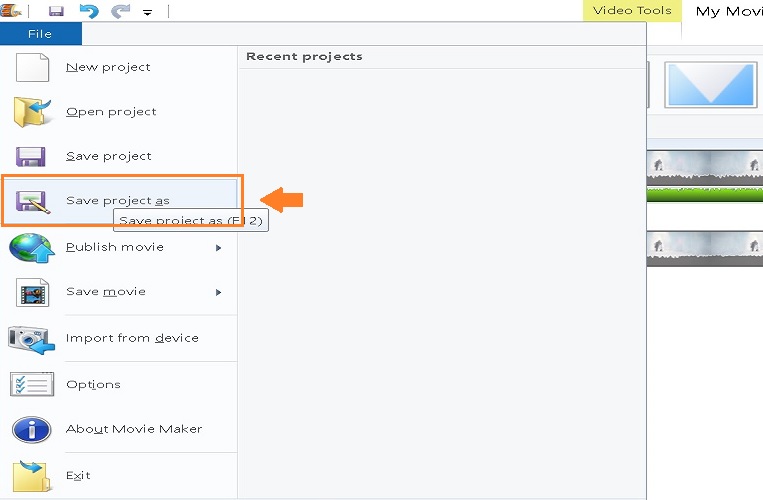
The last and the most important step of all is to save your project file in the proper location and the correct format. To save the video file, click on File and then Save project as in the uppermost left corner.
Here, you will be able to select the save location as well as the format you want your file to be saved in.
So, this was Windows Movie maker operation explained in simple 8 steps. Hope you have a great time editing your videos. Try it out for yourself now.


