Table of Contents
Windows 10 is the most popular Operating System developed by Microsoft. It’s available on multiple platforms such as Desktop, Mobile, Laptops, Smartphones, and Tablets. Sedlauncher.exe is a part of the Windows Operating System. Initially, you may think that Sedlauncher is an application error that is bogging down your CPU usage. Sometimes it causes the issue of High Disk CPU Usage. If you open Task Manager, you will see the “SedSvc.exe” and “SedLauncher.exe” processes running. These files are part of the Windows Remediation Service.
It is really very frustrating to keep getting a “High CPU Usage” warning on your system because of Sedlauncher. And sometimes, the Sedlauncher starts consuming 100% of disk usage or CPU usage, resultantly slowing down your PC.
If you are facing this problem, then do not worry. In this article, we are going to tell you what the Sedlauncher process is and how you can disable Sedlauncher or remove it permanently if it keeps coming back and causing high CPU usage issues.
What is Sedlauncher.exe on Windows 10 PC?
In Windows 10 OS, Sedlauncher.exe is a component of the Remediation Service. After the KB4023057 update package, Microsoft has included the Windows Remediation service in Windows 10 OS. This service is designed to improve the update speed and reliability of the Windows Update Service, which helps you to install all the latest security patches and additional features so your PC will be updated. Sedlauncher high disk usage on Windows 10 only when SedLauncher.exe and SedSvc.exe are in the process of downloading or installing large feature updates and at this time, the solution to Windows Sedlauncher’s high CPU usage is to wait for it to finish installing updates or to stop the update process.
How to fix Sedlauncher.exe high disk usage on Windows 10 computers?
Method 1-Temporarily Remove Rempel Launcher on Windows 10.
To easily fix the problem of high CPU usage problem, disable the launcher temporarily and then close all the processes i.e. sedsvc.exe and rempl.exe from the task manager.
Please follow the below process:
Step 1: Open the “Task Manager” and press Ctrl + Alt + Dele keys.
Step 2: Click all the relevant services that are consuming more CPU and “End Task“.
Step 3: Begin with the “Windows Remediation Service”.
Method 2 – Disable the “Windows Remediation Service”.
As previously stated, Sedlauncher.exe is a component of the Remediation Service, and directly disabling the main component can assist you in resolving the high CPU usage issue.
Please follow these steps:
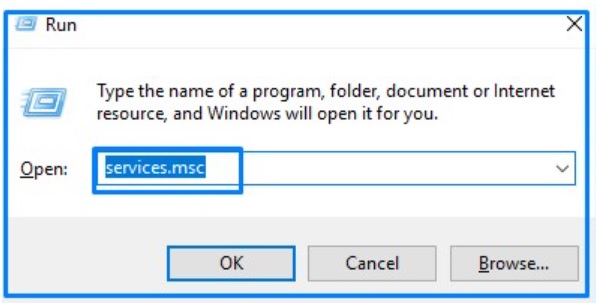
Step 1: Press the Windows + R key then type “services.msc” and click the OK Button.
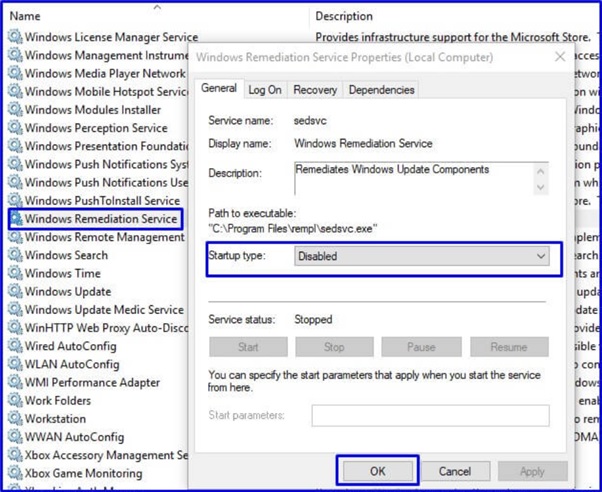
Step 2: A new window will appear in front of you, where you can be able to see all the running services. Scroll down the list and search for “Windows Remediation Service“.
Step 3: Double-click on “Windows Remediation Service” and then click on the “Stop” button.
Step 4: From the General tab, select “Startup type” and click on it.
Step 5: From the Drop-down list, select “Disable“.
Step 6: Click “Apply” and then click on “OK“.
Method 3 – By deleting the REMPL task schedule
The other easy method which can help you to deal with Sedlauncher high disk usage issue is by deleting the Rempel folder. Please follow these steps:
Step 1: Press Windows + R then type “taskschd.msc” and click “OK“.
Step 2: From the left-hand side, navigate to Microsoft > > Windows > > rempl folder.
Step 3: Click on the “Rempl” folder.
Step 4: Select the “Shell” task.
Step 5: Right-click on it then click on “Delete“.
Step 6: Finally click on “Yes“.
Method 4 – Block Sedlauncher.exe Using Antivirus Program.
One easy way to fix the Sedlauncher.exe high disk usage issue is by disabling its internet connection. Once you disable the connection to the EXE file, then it will stop consuming high space on your CPU. You can do it by using any third-party antivirus program.
Conclusion:
We have covered some effective fix methods which can help you to solve “Sedlauncher high disk usage on Windows 10”. You have to just apply these methods one by one until the issue is resolved.
If you have any questions or comments about the above article, please leave them in the comment section below. We will be happy to help you.


