Welcome you on very basic step by step guide for new beginner who want to learn website design using wordpress. Each steps I am showing you here attached screenshot which help you to understand better. Before start reading this blog I recommend please go thorough How to install wordpress in local machine so you can do experiment with your new blog. Now I assumed you have installed wordpress in your local machine or server .
Here I am showing all the step to make your blog full of energy from empty one ![]() . just follow below steps 🙂
. just follow below steps 🙂
Step 1. Login into wordpress admin dashboard
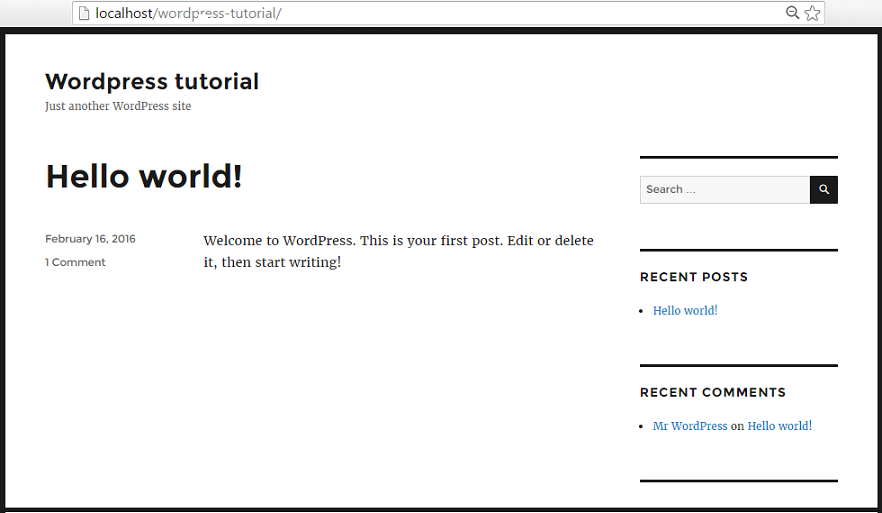
Once you install wordpress at local machine or server then please open website by providing domain name and if you are working on local machine then put localhost before your blog name like Localhost/Blogname. It look similar to below one.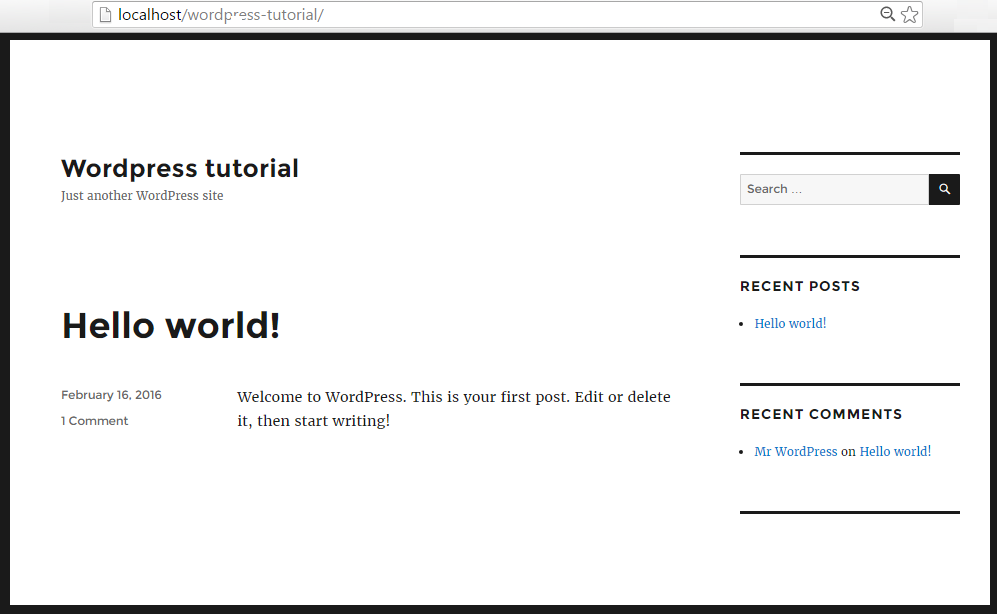
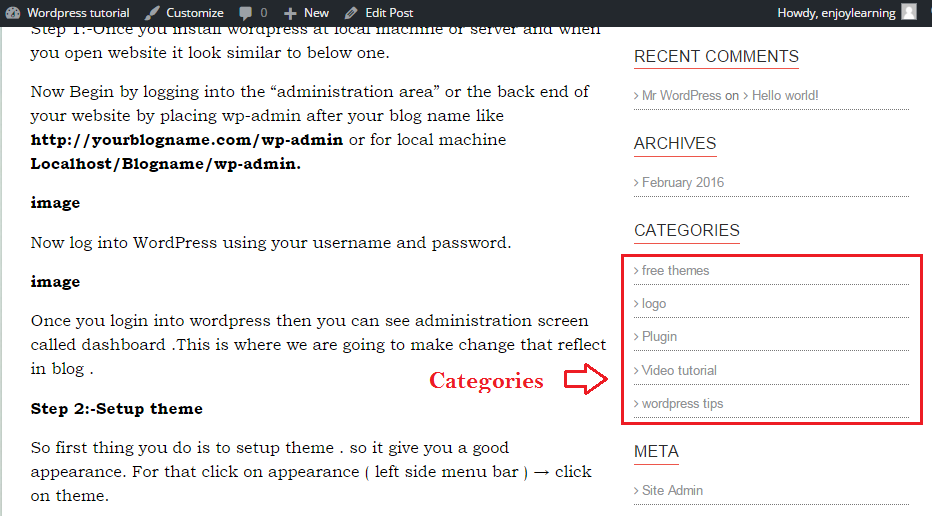
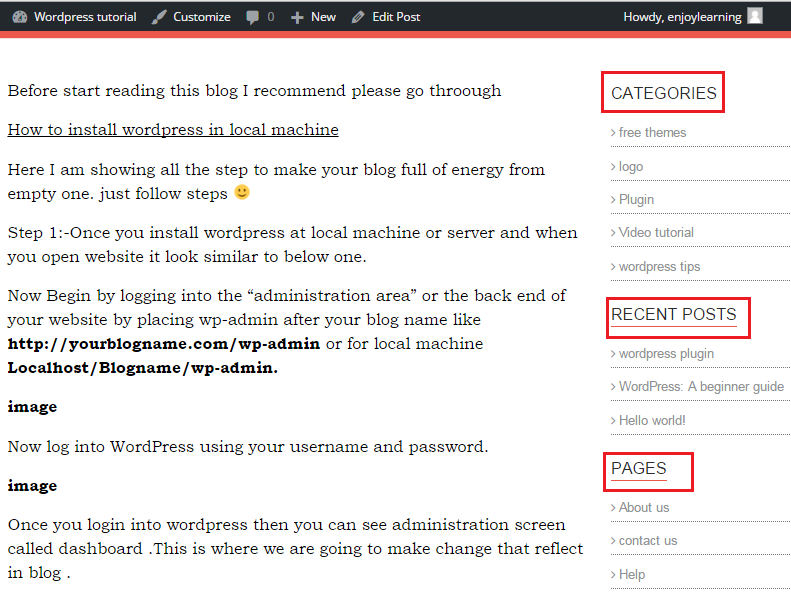
Now login into the “administration area” or the back end of your blog by placing wp-admin after your blog name like http://yourblogname.com/wp-admin or if you running on local machine then Localhost/Blogname/wp-admin.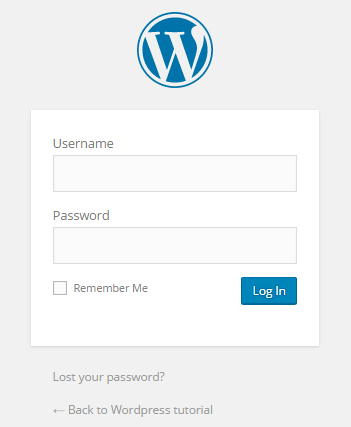
Login into WordPress using your username and password which you have provided when installed wordpress. You can change admin user name to something which can should be remember and complex too.
Once you login into wordpress then you can see administration screen called Dashboard .This is where we are going to make change that reflect in blog .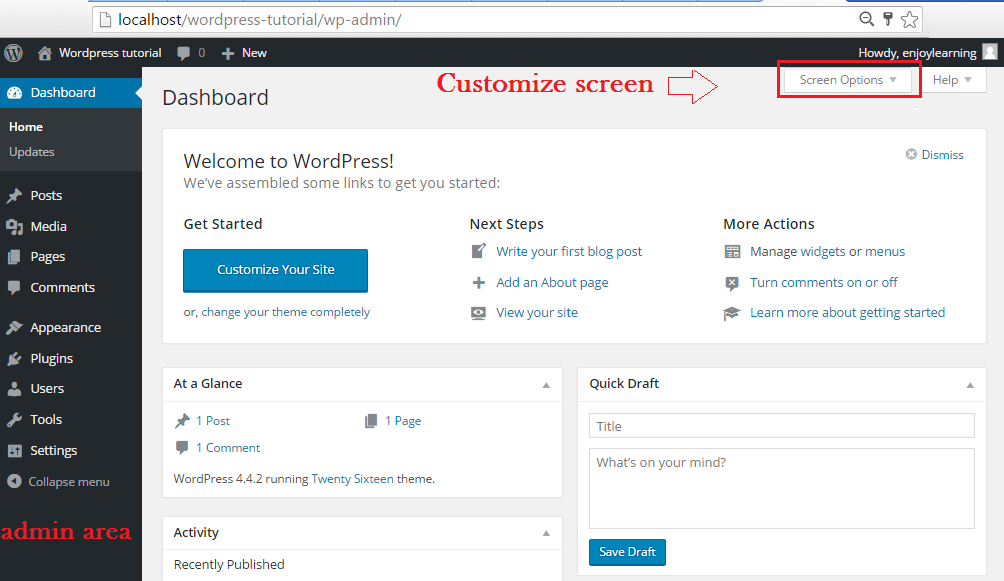
Step 2:-Setup theme
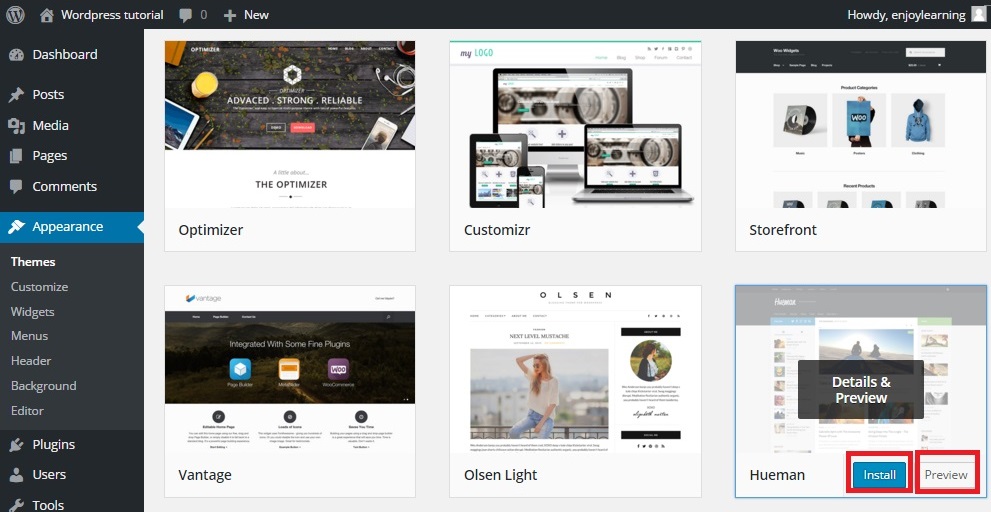
After login, first thing you need to do is setup a theme that gives your blog good appearance please select according your niche. In order to setup please click on appearance (left side menu bar) → click on themes(Sub-menu).
Then choose any theme from given themes on screen or click on add new themes which will give you plenty options of themes from where you can select as per your blog niche.
Once you add new theme or select from existing one then click on preview to check how theme look like after installation ..if you feel it’s suitable for your blog then hit install.
Once installation is complete then You need to active theme so to activate theme please click on Activate link as below.
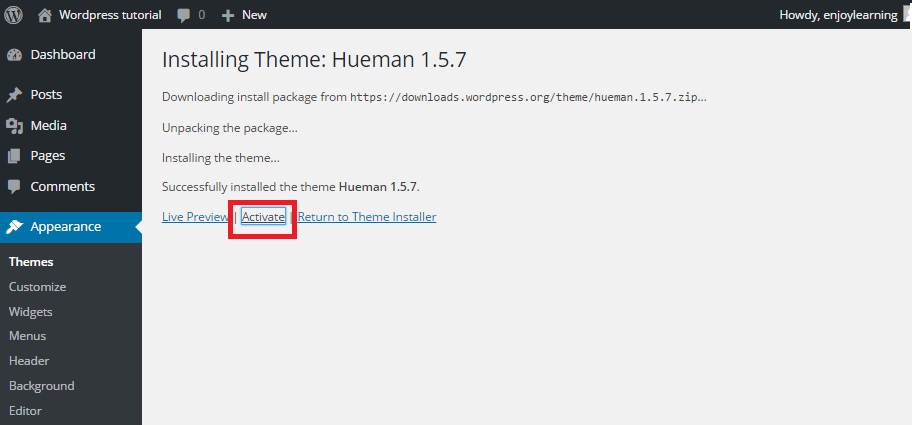
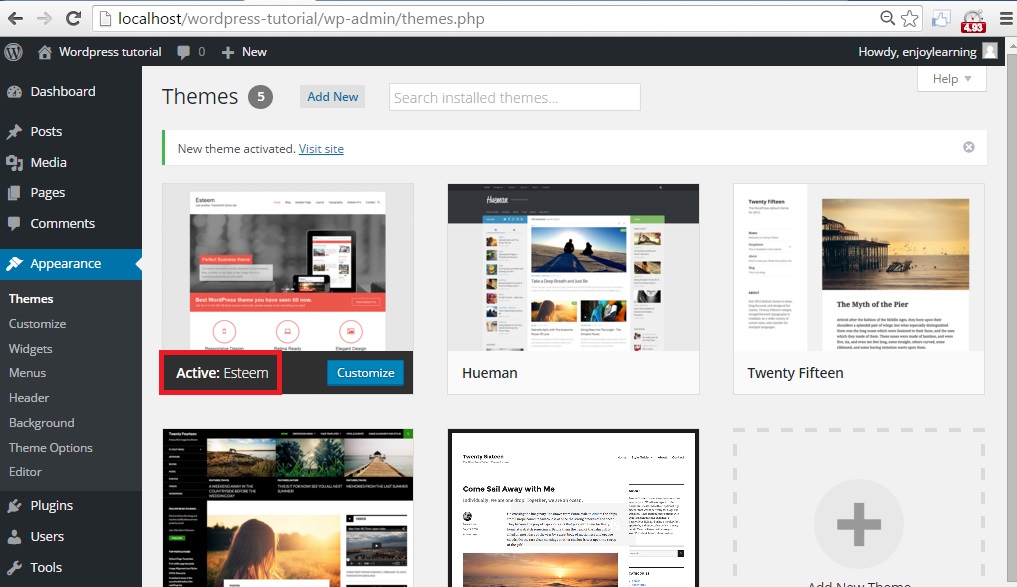
Now you can see Active with your activated theme as below.
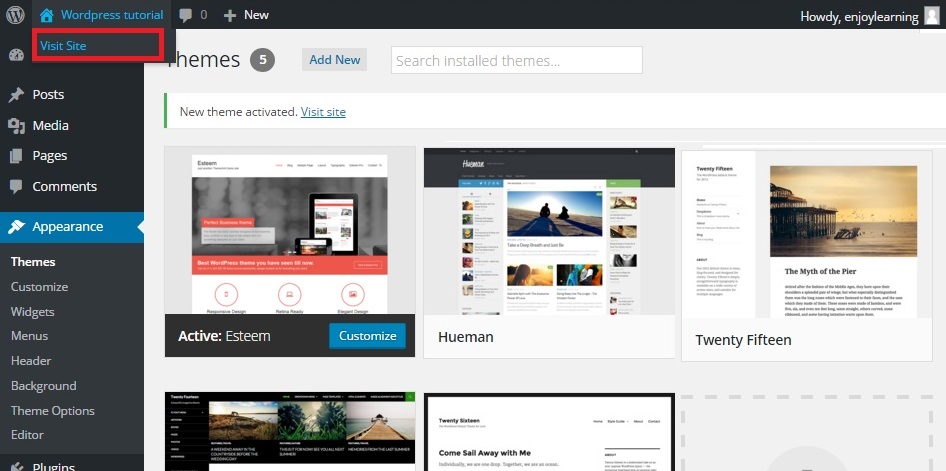
To check how your theme looks like please click on your blog name at upper left corner and select view site from sub-menu.
Now customize your installed theme by clicking on customize tab under appearance menu.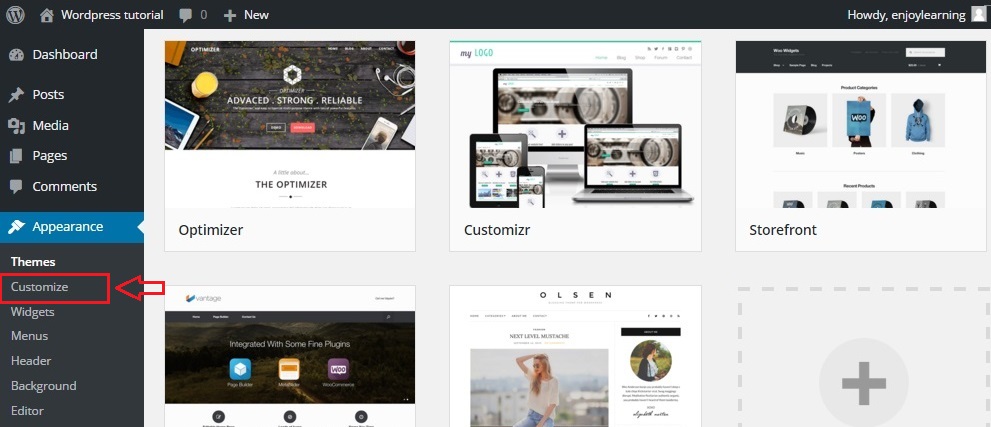
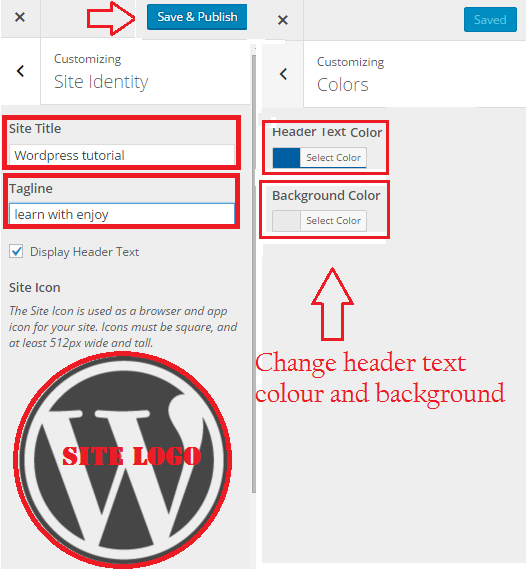
Few thing you should customize
Side identity:-Provide site title ,tag line and site icon which appear in title bar then click save and publish button(left upper side)
Colors:-You can change header text color and background color.
Static page:- Set front page as your latest posts so user can see latest post every time they open your website. If you select static page(which can not change) like home page .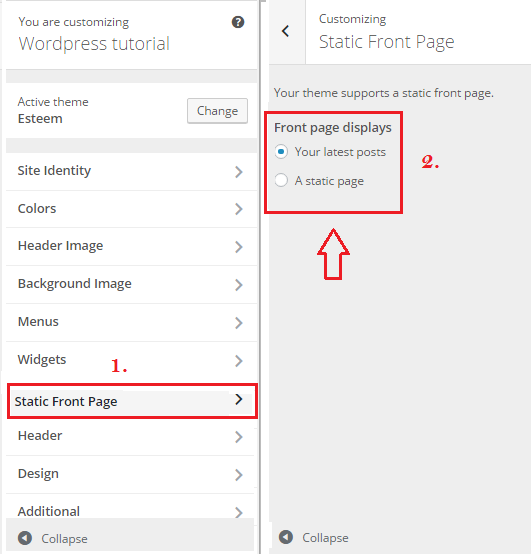
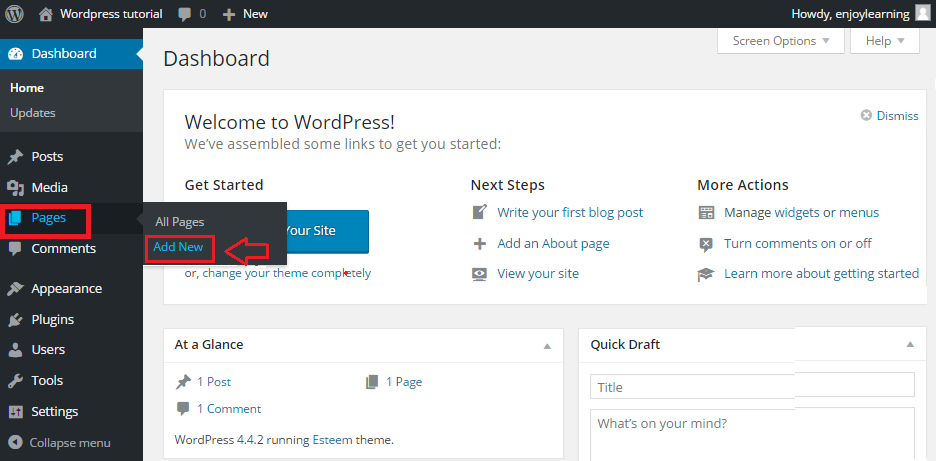
Step 3: Create pages
Now we are creating few pages for our blog like Homepage, About us pages .So in order to create pages you need to select pages option from left side menu and Add New from sub-menu.
Now give name to new page e.g. we are giving name HOME and click on publish button at right side .
Similarly create 4-5 blank pages(You can put information later time) like about us,contact us, mission and help. Even after pages has been added it wouldn’t show on screen because we need to add pages in menu option then only we can see… how to add? no worry just follow up.. ![]()
Step 4: Create menu (Adding pages to the menu )
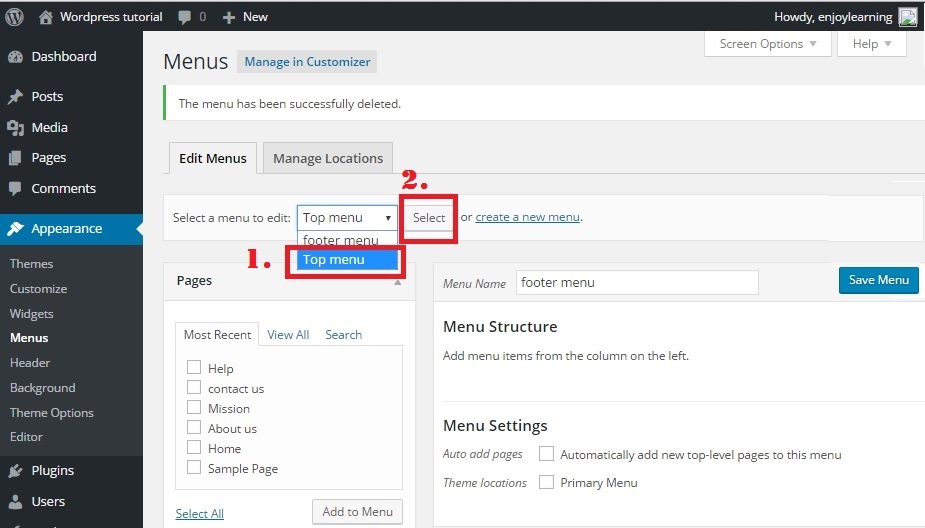
In order to create menu please click on appearance in left side menu then select menus then please click on create a new menu and provide any suitable name (like top menu or footer menu) and click on create menu button.
Once you create menu by upper steps then select “Top menu“ from dropdown and click on select button right side of dropdown as below as below.
Now select all pages which you want to show in top menu (from most recent tab of pages box )and click on add to Menu button.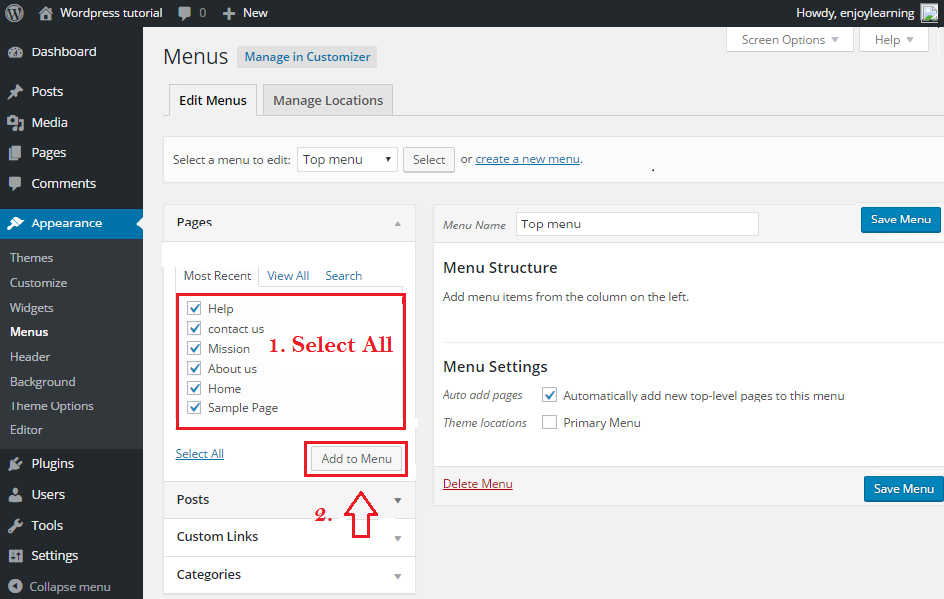
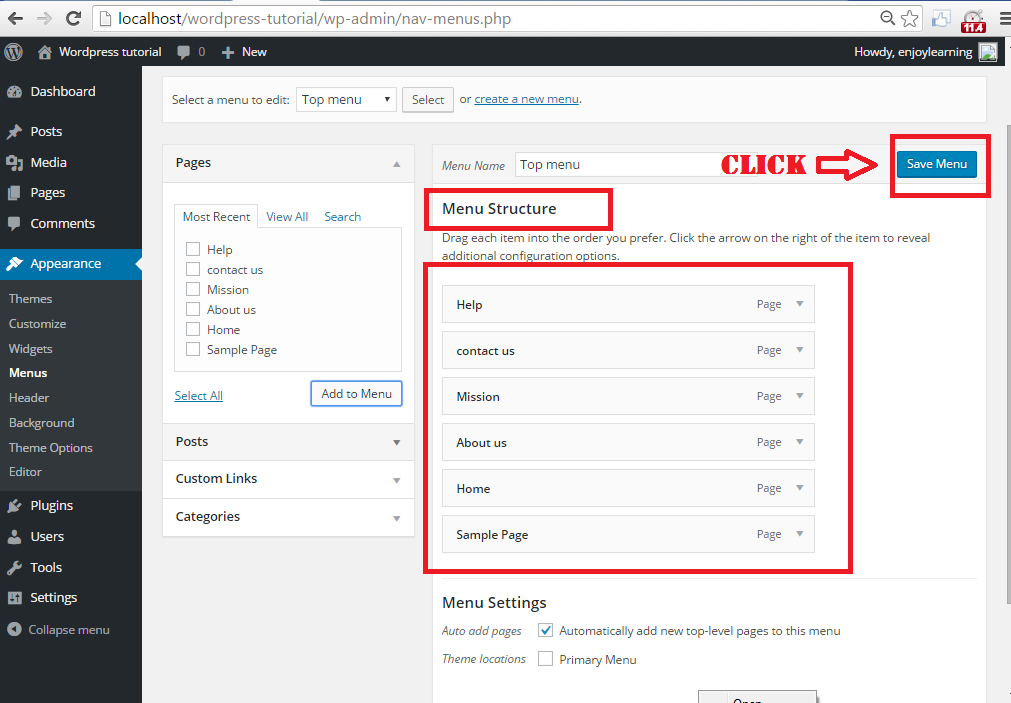
Once you tap on button then you can see all selected pages will reflect in right side menu structure box ..then click on save menu to get menu on front page.
Once it save all menu then you can open your website and check if it shown as menu or not . For me it’s below .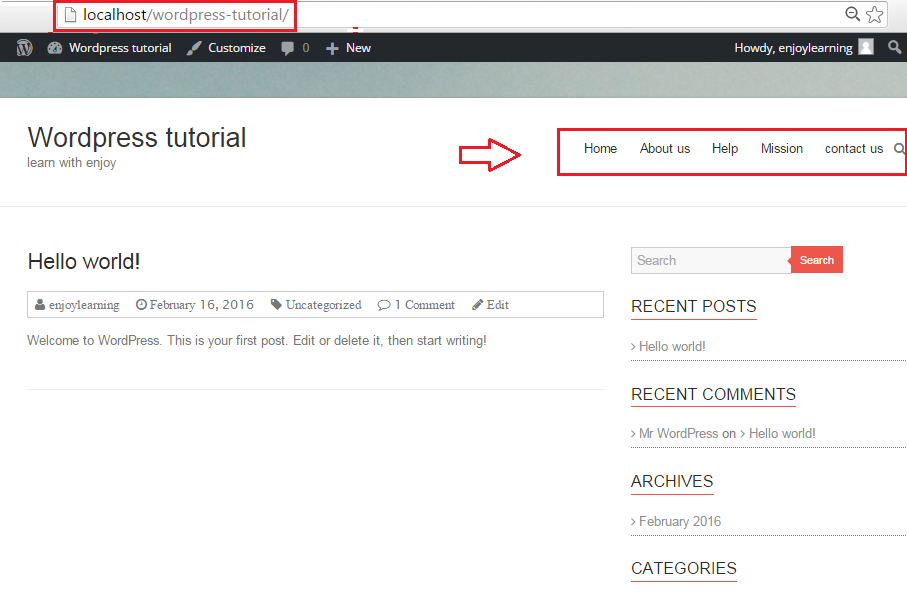
Step 5: Create categories
Before create any post we should go with categories creation first. so we can classified our blog post into different categories.
Let say you want to create one category name ‘video tutorial’ or any other which you want .
To do so, simply click on posts → select categories from left side menu .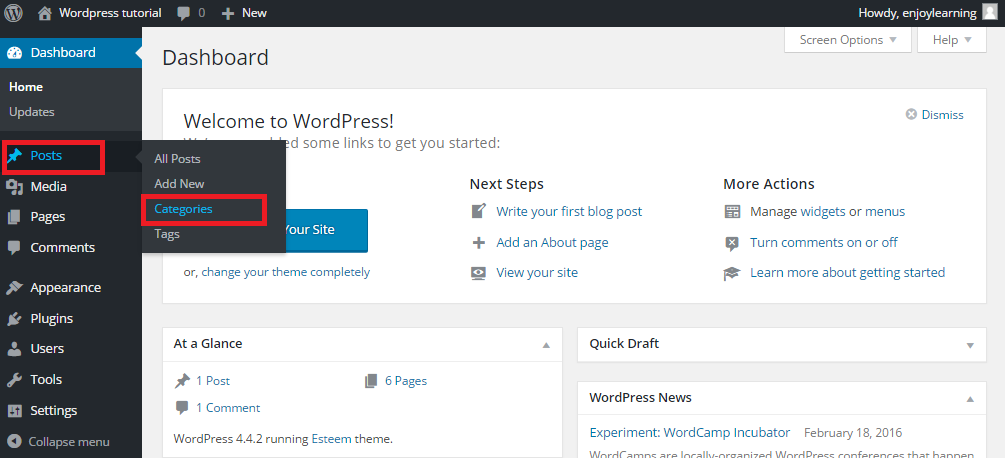
Give category name and click on Add New category at bottom left side . then you can see right side new categories would added successfully.
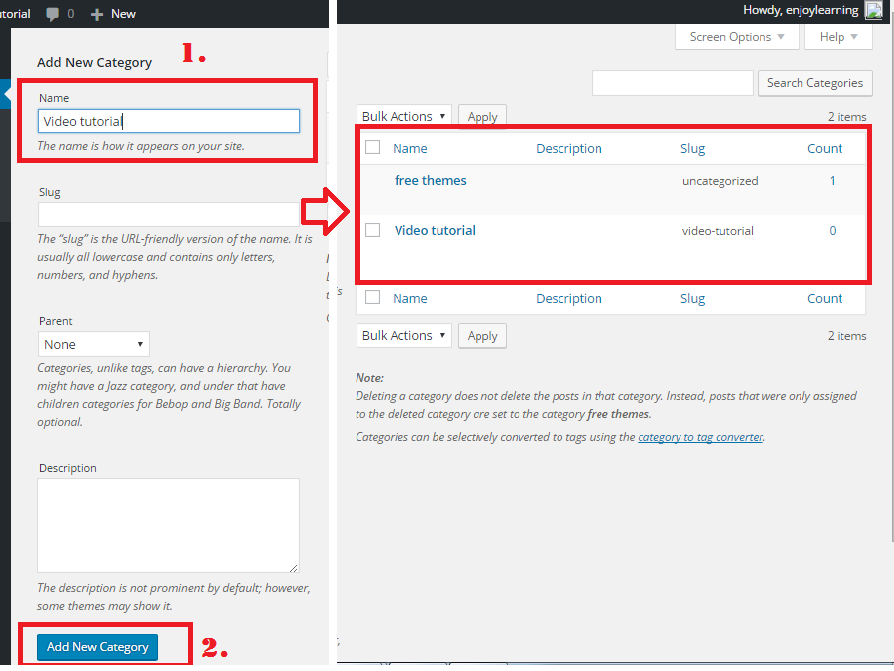
Now If you try to check categories on your blog then you can not see any of them because there is no any post belongs to that categories.
Note:-Once we add at least one post for any particular category then only category show on blog.
So Now we are going to learn how to add new post and add post in categories.
Step 6: Add post
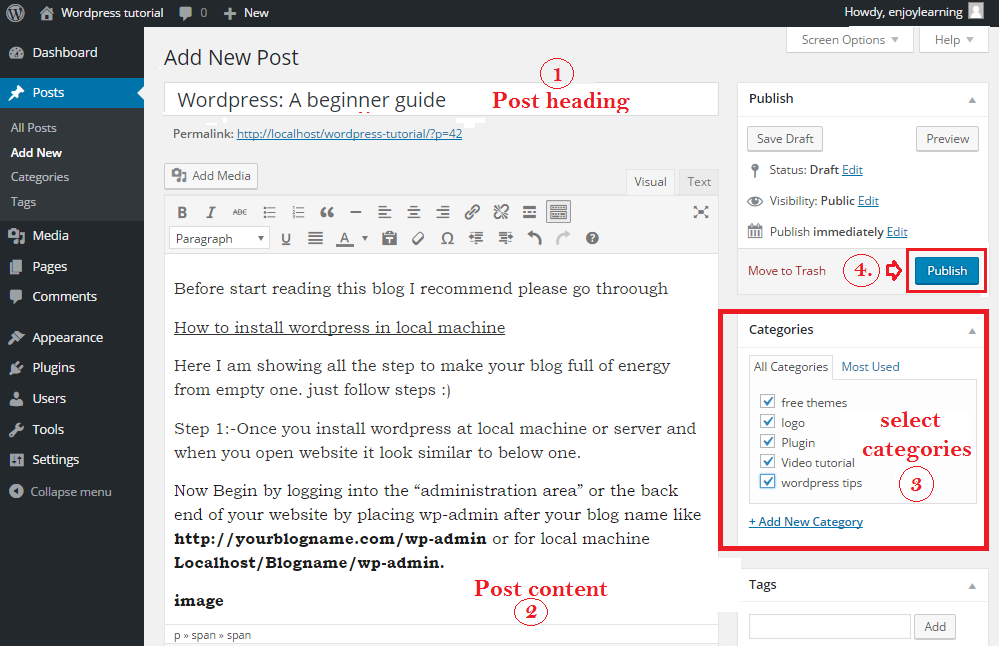
Similar to add categories and pages you can create new post by selecting post → Add new from left side menu.
Now provide appropriate heading to your post like I am giving ‘WordPress:A beginner guide’ for my post and write all content related to post. Then select categories for which this post belongs and click on Publish as below.
Click on the preview button just above Publish button check how your post look like..
For my case it look like 🙂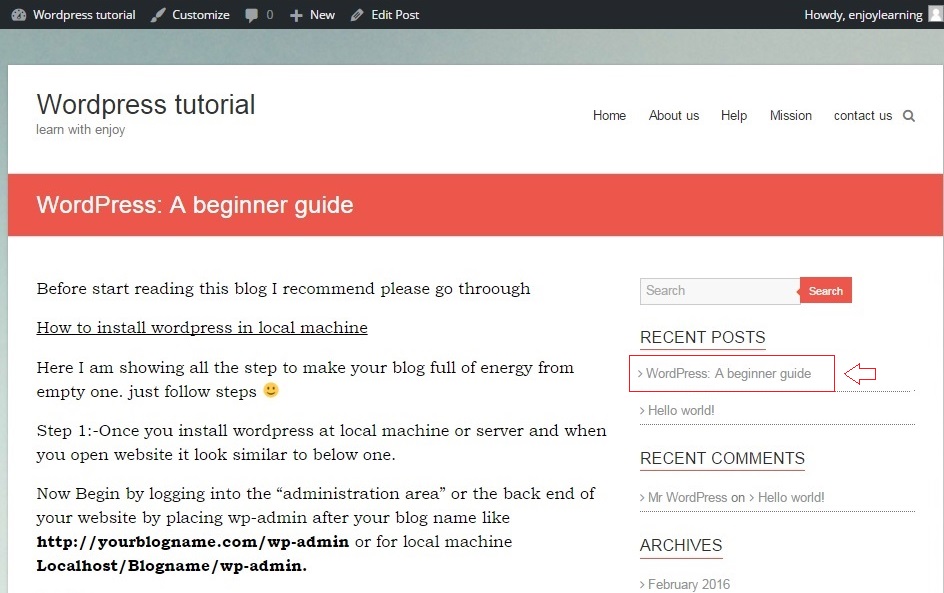
Looking good….is’nt it? On same page you can also see all categories which you have created ..because now you have posted blog against all categories.
Now we want to see category at top in right sidebar so do you know what we need to do? no…? ok…we need to customize right side be how? see below..
Step 7: How to customize Right Sidebar?
Your Right Sidebar must look much weird but you can customize it as per your choice.
To change right sidebar you need to again click Appearance and select Widget as below.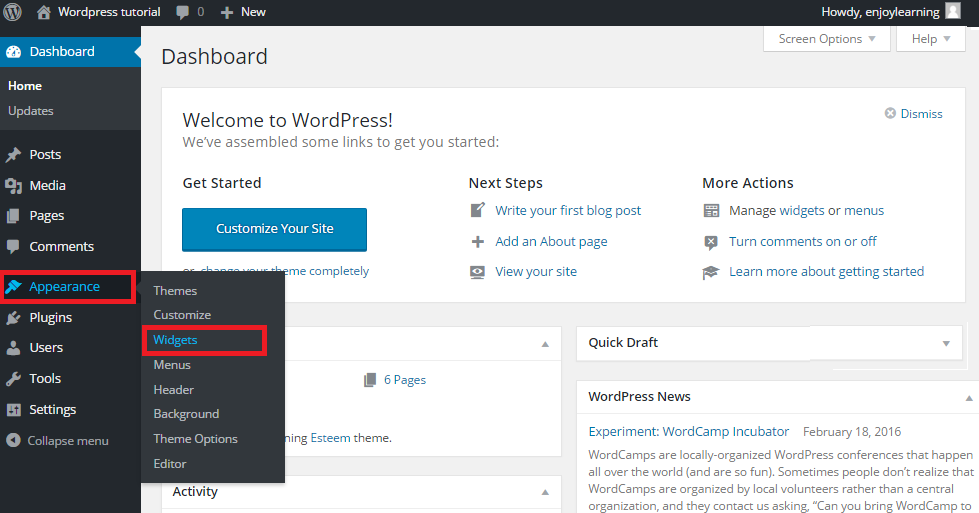
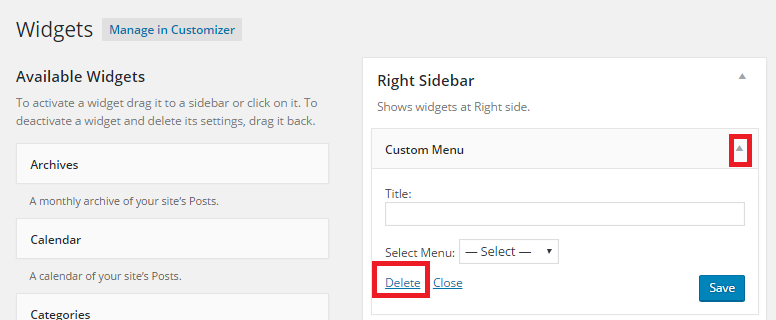
Now delete all existing widgets at right side by click on delete link in each widget.
Now add essential widgets only like categories,recent post,pages by just drag and drop from left side.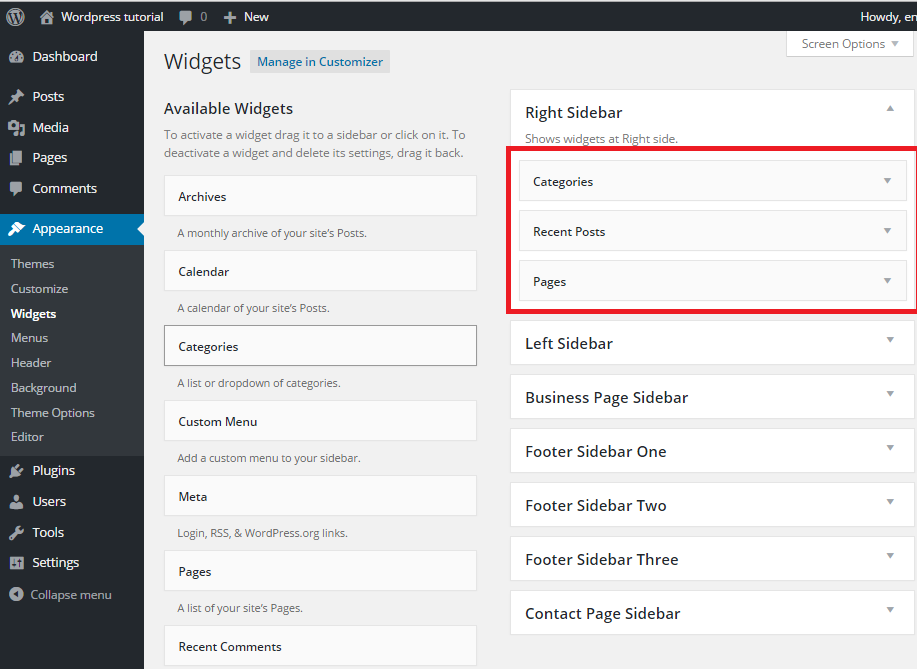
Now again Check how your blog look like by same way as above..my blog like below 🙂
Step 8: How to change logo image
It’s depend on theme whether you are uploading new theme or use wordpress default theme .You need to check theme option or header in appearance menu at left side . In my blog logo present in header option so I am selecting header as below.![]()
Then click on Add new image to upload your logo from your computer and then click on save and publish at top left side.
Now you can see your blog with uploaded logo .
That’s it!!!! now once you develop blog then please share your link in comment 🙂
Hope you like this blog post…If yes then please subscribe this blog, follows us on twitter, like our Facebook page and if you have any doubt or want to add something then please write us in comment or contact us.
A big thanks for reading !!!!![]()
